Installing tile flooring is not just a home improvement project; it’s an opportunity to express your style and elevate the look of your space. Whether you’re a seasoned DIY enthusiast or a first-timer, understanding the process can make all the difference. Let’s dive into how to achieve beautiful, durable tile floors in 2024.
Step 1: Gather Your Tools and Materials
Before you embark on your tiling journey, gather all the essential tools and materials. You will need:
- Tiles (choose from ceramic, porcelain, or natural stone)
- Thin-set mortar
- Tile spacers
- Grout
- Notched trowel
- Tile cutter or wet saw
- Level
- Measuring tape
- Sponge and bucket
- Safety gear (gloves, goggles, mask)
Having everything on hand will streamline the process and keep your project flowing smoothly.
Step 2: Prepare the Subfloor
Preparation is crucial for a successful installation. Ensure your subfloor is clean, dry, and level. Remove any old flooring and repair imperfections. If your subfloor is made of wood, consider installing a cement backer board for extra stability. If you’re unsure about the condition of your subfloor, reaching out to tile flooring services can provide you with the expertise needed to start off right.
Step 3: Plan Your Layout
Take the time to plan your tile layout—it’s worth it. Measure the room and mark a centerline to ensure a balanced installation. Use this centerline as your guide while dry-fitting the tiles. Adjust as necessary; this attention to detail will pay off, especially if you’re tackling a project like bathroom tile installation, where the right layout can enhance both style and function.
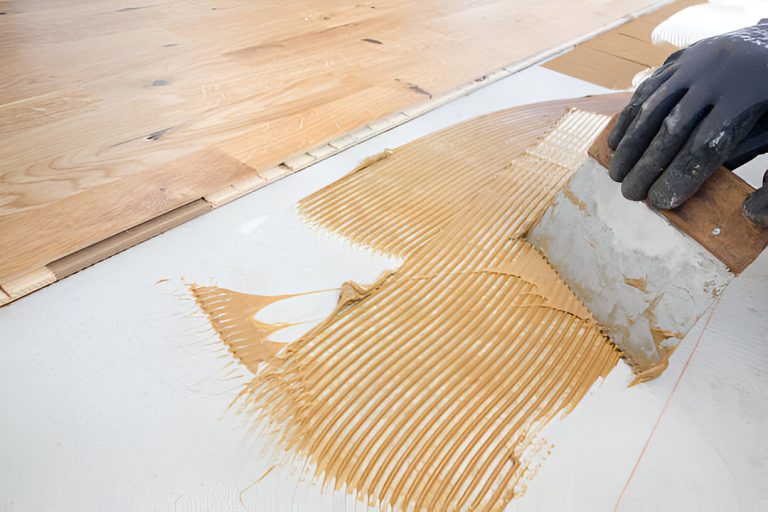
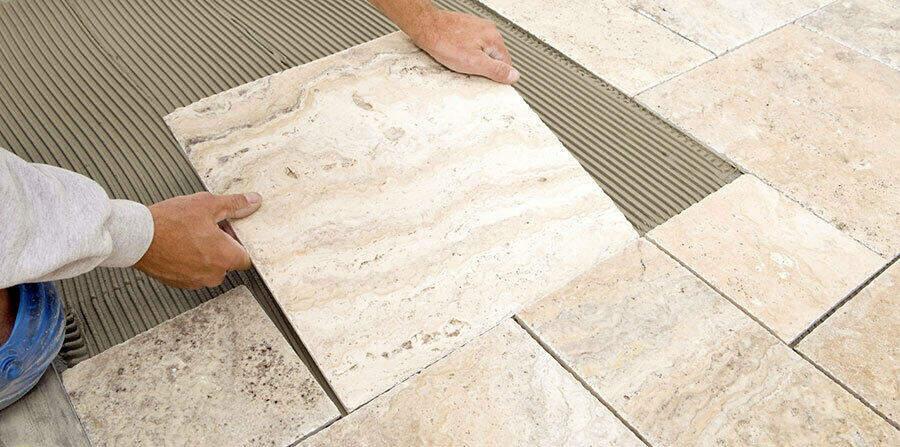
Step 4: Apply Thin-Set Mortar
Once your layout is set, it’s time to apply thin-set mortar. Using a notched trowel, spread a layer of mortar on the subfloor, working in manageable sections. Press each tile into the mortar, twisting slightly to ensure a good bond. Don’t forget to place tile spacers between each tile to maintain even gaps for the grout.
Step 5: Cut Tiles as Needed
You may need to cut tiles to fit around corners or edges. A tile cutter or wet saw will come in handy for this task. Measure carefully and always wear safety gear when cutting to protect yourself from dust and debris. It’s rewarding to see how a few well-placed cuts can make a huge difference in the overall look of your flooring.
Step 6: Allow Mortar to Set
After laying your tiles, resist the temptation to walk on them for at least 24 hours. This waiting period is essential for the mortar to cure properly, ensuring your tiles stay put for years to come.
Step 7: Grout the Joints
Once the mortar has set, it’s time for the fun part—grouting! Remove the tile spacers and mix the grout as per the manufacturer’s instructions. Use a rubber float to spread the grout diagonally across the tiles, filling all joints. Wipe away any excess grout with a damp sponge, being careful not to disturb the grout lines. This step is where your floor really starts to come together!
Step 8: Seal the Grout
To protect your hard work, apply a grout sealer after it’s fully cured. This will guard against moisture and stains, ensuring that your tile flooring remains beautiful over time.
Conclusion
Installing tile flooring can be a rewarding experience that transforms your home. With careful planning and execution, you can achieve stunning results. If you need help along the way, consider professional services for tasks like laminate floor installation, grout replacement, or tile removal and repair. Enjoy your beautiful new floors—after all, they are a reflection of your personal style and a testament to your hard work!